Exploring Kubernetes with Minikube

Introduction
I’m currently working in an Azure project and team members are considering to move various applications from VM to containers and run them in a Kubernetes cluster. They asked me to explore the Azure Kubernetes capabilities and document my experiences. While I was working on this assignment I thought that I could write two blog articles regarding my work: “Exploring Kubernetes with Minikube” (this article) and Running Azure Kubernetes Service (AKS) (next article).
What is Kubernetes?
Unless you have been living in a cave for the last few years you should know what Kubernetes is: a system to deploy, scale and manage containerized applications in a cluster. Docker is the most well-known implementation of the container runtimes and I used it in my demonstration.
So, basically instead of inventing the wheel again and write your own load balancing / fail over / other management infrastructure for your Docker containers just let Kubernetes to do all the heavy lifting for you.
What is Minikube?
Minikube is a single-node Kubernetes cluster that you can use locally in your own development machine to test your Kubernetes deployment scripts, explore and study Kubernetes etc. I used Minikube to learn Kubernetes concepts (see excellent Kubernetes’ own tutorials here), explored how to create pods, services etc. manually and then using a deployment script. I created the deployment script so that I can give the environment (minikube/azure) as a parameter and the deployment is pretty much the same in both environments. I’ll write about Azure AKS experiences in the next article, let’s focus in this article how to use Minikube as a Kubernetes runtime.
Minikube Installation on Ubuntu 18
Install a Hypervisor
I use Ubuntu 18 as my personal workstation (too old to learn Mac which seems to be popular among our younger developers, too frustrated to continue using Windows…). Minikube installation on Ubuntu 18 was pretty straightforward. You have to have a virtualization runtime (I use VirtualBox). BTW. I first installed VirtualBox from the website given in the previous link (installed as a deb package), but for some reason this version didn’t work with Minikube. I uninstalled that version and installed the version that comes from Ubuntu 18 repository using the standard ‘sudo apt-get install virtualbox virtualbox-ext-pack’.
Install Minikube and kubectl
I just followed the instructions in Minikube documentation, Linux instructions (curl … …/latest/minikube-linux-amd64…). So, Minikube is a Linux virtual machine image that you run in a hypervisor (like VirtualBox). Once you start Minikube you can start the VirtualBox GUI as well and see your new image there.
Kubectl is a command line interface to interact with Kubernetes environment (e.g. running in Minikube or Azure AKS). I used the “Install kubectl binary using curl / Linux” instructions.
Now is the time to boot Minikube for the first time:
minikube startThe first time you give the “minikube start” command it starts downloading the Minikube ISO image and kube tools, this takes a while, be patient. When you see: “Starting cluster components…” this also takes a while, be patient again. :-) When you finally see: “Kubectl is now configured to use the cluster. Loading cached images from config file.” you are done. Next try that your Minikube is up and running and your kubectl tool is working properly:
minikube status
kubectl cluster-info
Minikube command should tell that Minikube is running, the kubectl comand should show status information. Both commands give the IP number of Minikube VM (try to ping that ip number…).
Try to deploy the hello-minikube application given in the Minikube documentation to verify that your Kubernetes cluster works properly.
Explore Kubernetes using Minikube
All right! You have a working (single-node) Kubernetes cluster up and running in your local workstation. Now is the time to learn the Kubernetes basic concepts: pods, services, deployments etc. An excellent way to learn these concepts is to do the Kubernetes Tutorials using your Kubernetes cluster running in Minikube. So, you’ll learn commands like:
kubectl config current-context
kubectl get pods
kubectl get services
… kubectl config current-context command shows the current context, should print now: “minikube” (in the next article I tell how to switch between Minikube and Azure AKS contexts…).
So, I’m not going to teach you Kubernetes concepts here but I encourage you to learn that stuff doing the tutorials and reading some Kubernetes introduction document.
Minikube Dashboard and Terminal
You can get a Dashboard view to your Kubernetes cluster:
minikube dashboardYou should see output: “Opening kubernetes dashboard in default browser… Created new window in existing browser session.” And in your browser you should see something like this:
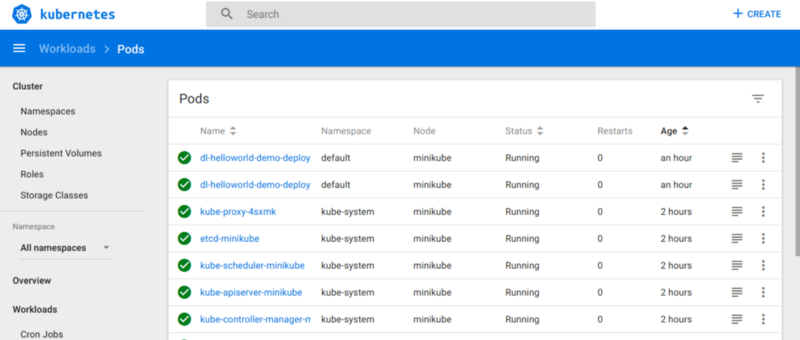
Minikube Dashboard.
The dashboard gives a nice GUI to explore your Kubernetes deployments and various components that were created during deployments (pods, services…).
minikube ssh”minikube ssh” command gives you ssh terminal to the Minikube VM. Try to logon and explore the Linux machine. ps aux and you should see quite a few kube and docker related processes.
Minikube and Docker
Once you are ready to deploy your first Kubernetes setup you need to build all your docker images you are using in your setup to Minikube docker runtime. I mostly followed this Kubernetes tutorial for this task. Basically you need to switch from your workstation’s Docker daemon to the Minikube’s Docker daemon:
eval $(minikube docker-env)Then try the familiar “docker images” command: it lists the Docker images not in your workstation but in the Minikube VM. So, run all your docker build scripts to build all your images you are using in your setup — the images will be stored in the Minikube VM.
Kubernetes Deployment Example
I created one Kubernetes deployment file and used the same file to deploy my application to Minikube and Azure AKS:
apiVersion: apps/v1
kind: Deployment
metadata:
 name: dl-helloworld-demo-deployment
spec:
 replicas: 2
 selector:
 matchLabels:
 app: dl-helloworld-demo
 template:
 metadata:
 labels:
 app: dl-helloworld-demo
 spec:
 containers:
 - name: helloworld-container
 image: REPLACE_TAG
 ports:
 - containerPort: 8080
---
apiVersion: v1
kind: Service
metadata:
 name: dl-helloworld-demo-svc
 labels:
 app: dl-helloworld-demo
spec:
 type: NodePort
 ports:
 - port: 8080
 nodePort: 30802
 protocol: TCP
 selector:
 app: dl-helloworld-demo
---
apiVersion: v1
kind: Service
metadata:
 name: dl-helloworld-demo-lb
spec:
 loadBalancerIP: REPLACE_IP
 type: LoadBalancer
 ports:
 - port: 8080
 selector:
 app: dl-helloworld-demo
The “REPLACE_TAG” and “REPLACE_IP” will be processed by my bash/sed script that finally calls the processed deployment file:
kubectl create -f deployment.ymlThe Kubernetes deployment process is pretty beautiful — the same deployment yml can be used to deploy your Kubernetes setup to practically any Kubernetes cluster. BTW. The Minikube part doesn’t need the static ip given in “REPLACE_IP” above — the Azure AKS deployment had a couple of extra steps, one being to create a static ip to be used in the deployment but let’s talk more about it in the next article.
And the final test that my setup is running and serving http requests:
minikube status => get the Minikube VM ip.
kubectl get svc => get your Kubernetes's load balancer service's port forward (e.g.: dl-helloworld-demo-lb LoadBalancer 10.110.140.111 <pending> 8080:31833/TCP => 31833.
curl <http://192.168.99.100:31833/hello?name=Jamppa> => My demo application returns: {"hello":"Hello, Jamppa"}
Conclusions
Kubernetes is a production-ready environment to run your containerized applications. Using Minikube you can learn easily the basic Kubernetes concepts and processes.
To Be Continued…
So, my Kubernetes story continues in the next article in which I’ll write a bit of my experiences using Kubernetes in Azure: AKS — Azure Kubernetes Service. Stay tuned!