Using AWS Wizards
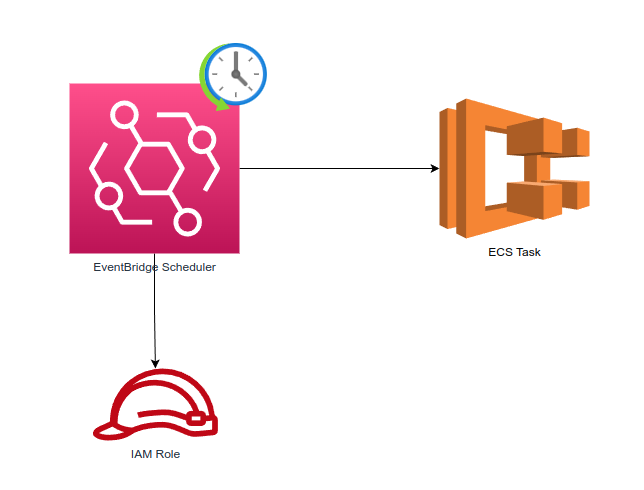
The players: AWS EventBridge Scheduler, IAM Role and ECS Task.
Introduction
In my previous blog post Cloud Infrastructure Golden Rules I gave two cloud infrastructure golden rules:
- All infrastructure must be created fully automatically by the infrastructure code (whether it’s Terraform, Pulumi or some cloud native code like CloudFormation).
- The infrastructure solution must be so simple that any developer in the software project is able to do both applications and infrastructure.
I later on also wrote that you are allowed to use the AWS Console in certain situations. In this blog post I depict one of these occasions in which you could use the AWS Console to make your life as a cloud infrastructure programmer a bit easier.
Using AWS Wizards
Sometimes, you can make your life a bit easier using the AWS Console and its wizards to create the AWS resources. But you don’t use these resources in production. You just create the resources to examine what kind of resources the AWS wizard creates to replicate the resources using your cloud infrastructure tool of choice. I.e.: In production, all your cloud infrastructure must reflect your infrastructure code.
Let’s use an example. The other day I needed to create an Amazon EventBridge Scheduler to trigger an ECS Task. I read the documentation and understood that I need to create an AWS IAM Role for the scheduler.
To make my life easier I opened AWS Console and navigated to the Amazon EventBridge / Scheduler page. Then I clicked the “Create Scheduler” button. The wizard started and asked various questions. At the end, there was the permissions page, in which I chose “Create new role for this schedule”. Finally, the wizard showed the selections and provided the “Create schedule” button - I clicked it. The wizard created the scheduler, but more importantly it created the Role for it - I was particularly interested in the Role.
I went to the AWS IAM Roles view and found the new role. In the “Trust relationship” tab it said:
{
    "Version": "2012-10-17",
    "Statement": [
        {
            "Effect": "Allow",
            "Principal": {
                "Service": "scheduler.amazonaws.com"
            },
            "Action": "sts:AssumeRole",
            "Condition": {
                "StringEquals": {
                    "aws:SourceAccount": "99999999999"
                }
            }
        }
    ]
}
(NOTE: the account is anonymized to “99999999999”, also in the next code examples.)
In the “Permissions” tab it provided an inline policy:
{
    "Version": "2012-10-17",
    "Statement": [
        {
            "Effect": "Allow",
            "Action": [
                "ecs:RunTask"
            ],
            "Resource": [
                "arn:aws:ecs:eu-west-1:99999999999:task-definition/my-test-api-ecs-task-def:*",
                "arn:aws:ecs:eu-west-1:99999999999:task-definition/my-test-api-ecs-task-def"
            ],
            "Condition": {
                "ArnLike": {
                    "ecs:cluster": "arn:aws:ecs:eu-west-1:99999999999:cluster/my-test-api-ecs-cluster-fargate"
                }
            }
        },
        {
            "Effect": "Allow",
            "Action": "iam:PassRole",
            "Resource": [
                "*"
            ],
            "Condition": {
                "StringLike": {
                    "iam:PassedToService": "ecs-tasks.amazonaws.com"
                }
            }
        }
    ]
}
This inline policy contains quite a bit of information, and it could have been a bit tedious to find the right configuration just by reading the documentation.
Next, I wrote the SAM template using that example the wizard had created for me:
...
  ApiSchedulerRole:
    Type: AWS::IAM::Role
    Properties:
      AssumeRolePolicyDocument:
        Version: 2012-10-17
        Statement:
          - Effect: Allow
            Principal:
              Service:
                - scheduler.amazonaws.com
            Action:
              - sts:AssumeRole
      Policies:
        - PolicyName: ApiSchedulerRolePolicy
          PolicyDocument:
            Version: 2012-10-17
            Statement:
              - Effect: Allow
                Action:
                  - "ecs:RunTask"
                Resource:
                  - !Ref ApiECSTaskDefinition
              - Effect: Allow
                Action:
                  - "sqs:SendMessage"
                Resource:
                  - !GetAtt ApiDeadLetterQueue.Arn
              - Effect: Allow
                Action:
                  - "iam:PassRole"
                Resource:
                  - "*"
                Condition:
                  StringLike:
                    iam:PassedToService:
                      - ecs-tasks.amazonaws.com
...
As you can see, it is quite straightforward to create the infrastructure code from the working example.
And once you have created the actual resource using your IaC tool, you can compare the two resources: the one created with the AWS wizard, and the one created by your infrastructure code - they should be pretty identical.
Conclusions
Sometimes using the AWS Console wizards are the way to go to make your life a bit easier as a cloud developer.
The writer is working at a major international IT corporation building cloud infrastructures and implementing applications on top of those infrastructures.
Kari Marttila
Kari Marttila’s Home Page in LinkedIn: https://www.linkedin.com/in/karimarttila/